Open Street Maps (OSM) to CommonRoad Conversion
This conversion allows you to convert road networks from the OpenStreetMap (OSM) format format to the CommonRoad format (2020a).
Quick Start Guide
Command Line Interface
Want to quickly convert an OSM file detailing an OSM map to a XML file with a CommonRoad scenario?
Use the command
crdesigner map-convert-osm -i input-file.osm -o output-file.xml.
Note
You have to activate the Python environment in which the CommonRoad Scenario Designer is installed before using the command line.
For example, crdesigner map-convert-osm -i test.osm -o new_converted_file_name.xml
produces a file called new_converted_file_name.xml
Note
If no output file name is specified, the converted file will be called input-file.xml,
e.g., crdesigner map-convert-osm -i test.osm produces a file called test.xml.
You can also use the GUI to convert an OpenDRIVE file.
The GUI can be started from command line with crdesigner or crdesigner gui.
Python APIs
import os

from crdesigner.input_output.api import osm_to_commonroad

from commonroad.scenario.scenario import Tag
from commonroad.common.file_writer import CommonRoadFileWriter, OverwriteExistingFile
from commonroad.planning.planning_problem import PlanningProblemSet

import crdesigner.map_conversion.osm2cr.converter_modules.converter as converter
import crdesigner.map_conversion.osm2cr.converter_modules.cr_operations.export as ex
from crdesigner.map_conversion.osm2cr import config
from crdesigner.map_conversion.osm2cr.converter_modules.osm_operations.downloader import download_around_map

# download a map
download_around_map(config.BENCHMARK_ID + '_downloaded.osm', 48.140289, 11.566272)

# --------------------------------------- Option 1: General API ------------------------------------------
# load OSM file, parse it, and convert it to a CommonRoad scenario
scenario = osm_to_commonroad(config.SAVE_PATH + config.BENCHMARK_ID + ".osm")

# store converted file as CommonRoad scenario
writer = CommonRoadFileWriter(
    scenario=scenario,
    planning_problem_set=PlanningProblemSet(),
    author="Sebastian Maierhofer",
    affiliation="Technical University of Munich",
    source="CommonRoad Scenario Designer",
    tags={Tag.URBAN},
)
writer.write_to_file(os.path.dirname(os.path.realpath(__file__)) + "/" + "ZAM_OSM-1_1-T1.xml",
                     OverwriteExistingFile.ALWAYS)


# ----------------------------------- Option 2: OSM conversion APIs --------------------------------------

# open the map and convert it to a scenario
scenario = converter.GraphScenario(config.SAVE_PATH + config.BENCHMARK_ID + ".osm")

# draw and show the scenario
scenario.plot()

# save the scenario as commonroad file
scenario.save_as_cr(config.SAVE_PATH + config.BENCHMARK_ID + ".xml")
# save the scenario as a binary
scenario.save_to_file(config.SAVE_PATH + config.BENCHMARK_ID + ".pickle")

# view the generated
ex.view_xml(config.SAVE_PATH + config.BENCHMARK_ID + ".xml")
In order to use the API calls, the save_path and Benchmark_ID has to be set in the config file. The config file can be found at /crdesigner/map_conversion/osm2cr and is described in detail at the end of this document.
The GUI provides also functionality to edit already the OSM graph structure before converting to CommonRoad.
Implementation Details
Format differences
OpenStreetMap (OSM) files and CommonRoad (CR) scenarios are formats that can both represent road networks with additional elements. While they both use XML to be stored on disk the internal structure has many differences. We will only look at the ones important for the conversion.
Firstly, the road network in OSM is basically a graph with nodes and edges. One edge represents a road. In CR, we have lanelets and information about intersections. The coordinates (GPS) in OSM are rough and the amount of points per road section is much smaller. To accomplish the conversion, we have to use heuristics and interpolation for guessing the reality behind the data.
OSM also contains other elements like traffic signs. All this information is stored in so called tags or relations. With CR version 2020.2 new elements are added to the scenario format: traffic signs and traffic lights.
Important Files and Directories
/converter_modules/osm_operations: All files regarding information extraction from the given .osm file.
/converter_modules/graph_operations: Files that are needed to create a road_graph object.
/converter_modules/intermediate_operations: Files used for creating the intermediate format.
/converter_modules/cr_operations: Files for exporting and creating the the final a commonroad scenario.
config.py: The config file contains all settings related to the conversion process.
/converter_modules/converter.py: This file orchestrates the whole conversion. It calls the different stages described earlier during the conversion process.
/converter_modules/utility: This directory contains various tools and files that are used throughout all stages, such as the ID generator for all elements in the final commonroad scenario.
Conversion Process
The conversion process consists currently out of three stages:
osm to road_graph: In the first stage all information from the .osm file is extracted and a road graph is created. This procedure is described in detail by the original thesis written by Maximilian. Later on, the creation of traffic signs and traffic lights were also added to this stage, since they could be parsed from the .osm file. All files which are used during this converting stage can be found in /osm_operations and /graph_operations.
road_graph to intermediate_format: The intermediate format was added to perform operations on the road graph easier. In this stage intersections with lane specific data are created (through lane, turn right, turn left, …). Also, intersections are enhanced and traffic lights are added, which were missing in the initial .osm file. All related files can be found in /intermediate_operations.
intermediate_format to cr_scenario: In the last stage the intermediate format is exported to a commonroad scenario. During this process checks for converting errors are performed. Also, the benchmark ID and other scenario tags are added. All files for this stage can be found in /cr_operations.
Lanelet Conversion
Extremely simplified the main conversion process to lanelets works as follows:

The program takes an OSM file as input and parses it into the internal representation (graph).

Afterwards, each edge that is representing a road with multiple lanes is split into these lanes so that there is exactly one edge per lane. As intersections are only represented by single nodes in OSM, the lanes are cut of within a specific radius around the intersections and linked together again.

Traffic Sign Conversion
Currently there are three different methods to retrieve information about traffic signs:
max_speed tag from highways: Usually every highway in the .osm file has a designated speed limit tag assigned to it. This tag is then used to create max speed signs. See osm wiki for more information.
traffic_sign tag from .osm file: In some cases designated traffic signs tags are found onto edges highways in the .osm file. These can be then used to parse traffic signs later on. However, these tags are country specific and not very well maintained. Therefore not much effort was done here for a world wide coverage. See osm wiki for more information.
mapillary: Mapillary is an open source data base that can be used to retrieve more detailed information about road networks. Osm2cr uses mapillary as its main source for traffic signs. To enable mapillary, an API key has to be provided in the config.py. Mapillary is very convenient, since it has world wide coverage and a unified database for traffic signs. See Mapillary’s documentation about traffic signs for more information.
The file traffic_sign_parser.py in /graph_operations is used to process all information about traffic signs. It provides a mapping for all traffic signs found in the .osm file and mapillary to the traffic sign format used for CommonRoad and returns the final TrafficSignElement.
Traffic signs are only assigned to the beginning or the ending of lanelet. It can therefore happen to have multiple signs or illogical sign combinations for a single lanelet.
Traffic Light Conversion
Usually, an .osm file only uses a single traffic_signal tag to determine if an intersection makes use of traffic lights or not. Therefore, missing information about light cycles and traffic light positions on incoming lanes has to be added during the conversion process. The following steps summarize this process:
A traffic_signal tag is found in the .osm file and added to an edge on the road graph during the osm to road_graph stage.
In the intermediate_format to cr_scenario stage, all edges, which are part of intersections, are checked for the traffic signal tag. Only when a single traffic light is found, new traffic lights will be added to all other incoming lanelets of that intersection.
A generic traffic light cycle for lights is generated based on the number of incoming lanelets. The duration for this cycle can be set in the config.py.
The intersection is saved together with traffic light references in the intermediate format.
Intersection Creation
No reliable information about lane directions of intersections is currently saved in .osm files. Therefore, these directions and other relations of lanes in intersections have to be calculated during the intermediate_format to cr_scenario stage.
Right- left- and through lanes are based on their degrees they enter and exit an intersection with.
Successor relations are based on the earlier assigned tags left-, right- and through-lane
Relations and directions for too complicated intersections are not reliably calculated yet and have room for improvements.
When does the automated conversion work?
This tool was originally created to automatically convert OSM files to CommonRoad scenarios. Unfortunately, the tool is not capable to convert all kinds scenarios. This is because of the fundamental difference of the two formats. OSM only describes the rough course of a street while CR depicts the boundaries of each drivable lane. Especially the representation of intersections differs, as they are only points in OSM, while CR files contain all lanes, connecting the streets across the intersection. The missing information is generated by the tool following many heuristics and modifiable parameters. In many cases it is necessary to adjust these parameters or guide the tool by hand instead of relying on the heuristics.
Please be always aware, that the automated tool generates only realistic scenarios, which do not fit reality perfectly. Do not use them as maps for autonomous vehicles if you did not review them by hand!
Scenarios That Will Work Well
There are many scenarios for which the automated conversion will perform well. For example motorways and highways, which do not have complicated intersections will be converted quite reliably. Roads with few lanes, low curvature and far apart intersections, such as parking lots, will also be converted correctly most times.
A few positive examples can be seen in the following:

Simple straight roads intersecting.
A larger intersection with many lanes.

An example for a small town.

A simple roundabout.

A large motorway intersection. Please note that tunnels are not supported yet.

A motorway access. Please note that tunnels are not supported yet.
Problematic Scenarios
The conversion process can fail because of various reasons. Problematic occurrences we experienced repeatedly are listed in the following.
Faulty OSM Data
Relying on solely OSM data for the generation of a scenario causes the tool to be extremely prone to incomplete and faulty OSM data. This seems obvious, but it is easy to overlook small flaws that will cause the result to be surprisingly erroneous. For example, it occurs frequently, that small segments of roads do not have lane count information. This causes the result to have a different count of lanes for these small segments as visible in the following example:

OSM file

CR result
To overcome this issue, it will be easiest to correct the OSM data, for example with the tool JOSM. If the info about lane counts is just missing and not wrong, you can also edit the LANECOUNTS Parameter in config.py, to lead the tool to choose the correct count by default.
Large Intersections
Linking lanes across intersections in a reasonable manner becomes exponentially more difficult for intersections of many streets. We therefore did only build detailed heuristics for intersections with up to four streets (segments of roads that lead to the intersection) involved. For larger intersections, there is a fallback heuristic, which might work well if all streets have only one lane per direction but will most likely produce insufficient results otherwise.
Example:

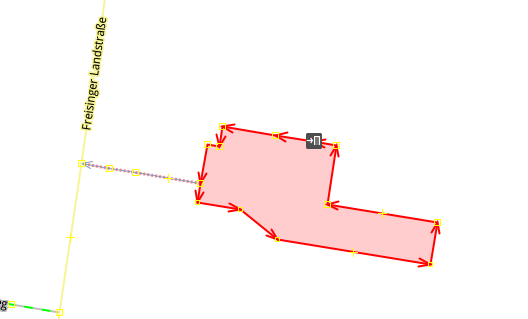
The linking of lanes across intersections can be guided by hand in the GUI of this tool.
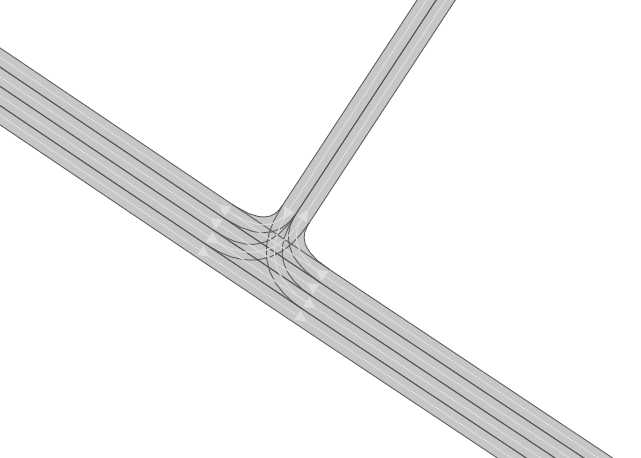
Narrow Winding Streets
The tool creates the course of lanes by offsetting the central course of roads. This offsetting procedure will not work well for wide roads with tight curves.
Example:
OSM file
CR result
This problem occurs rarely and usually only concerns very small streets, for example the driveways of an underground car park. If you nonetheless need to depict such streets in CR, you can try to model the course accurately in the Edge Edit GUI.
Streets Running Close Together
Streets are cropped at intersections to leave space for the turning lanes on the intersection. By default, they are cropped until they have at least a certain distance to all other streets. When two roads are running closely together, it can happen that both of them are cropped far wider than necessary. This results in oddly long turning lanes.
Example:

If you encounter this problem, try to set the parameter INTERSECTION_CROPPING_WITH_RESPECT_TO_ROADS in config.py to False. Then the tool will crop roads until a certain distance to the center of the intersection.
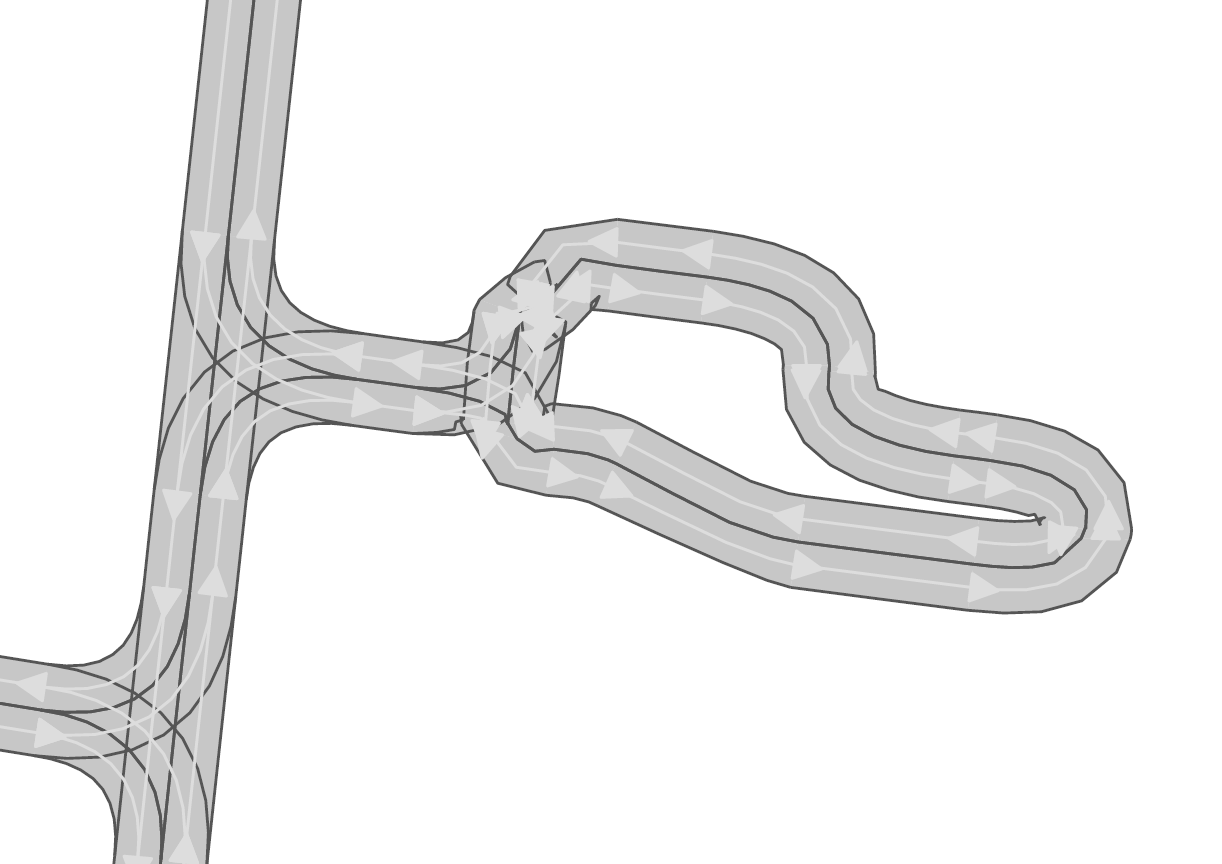
Very Complicated Scenarios
There are several factors, which can make a scenario complicated. We see most problems when there are many large intersections (containing many lanes/streets) close together. In such cases many things can go wrong.
Example:

OSM file

CR result
We advice to use the GUI for such scenarios and pay close attention to every street segment. If you are doing that, it is also helpful to set the parameter DELETE_SHORT_EDGES in config.py to False. This will prevent the tool from deleting road segments it considers as too short, as they can be reviewed in the GUI. In some cases it might still be necessary, to create at least parts of the scenario by hand.
Left Hand Traffic
The tool assumes right hand traffic for all scenarios.
External Data Sources
Geonames Scenario Infos
Geonames is a free database that contains information (such as population density) about over eleven million places worldwide. When providing a Geonames username in the config.py, a Geonames ID will be stored in the scenario. This ID can be later on used to retrieve further location information about the scenario.
Mapillary Traffic Signs
Additionally to traffic signs from the given .osm file, the converter is also able to use Mapillary as an external source of signs. Mapillary is an open source community mapping tool, that provides more detailed insights in road networks based on real camera footage. In order to request data from Mapillary, an API key is needed, which can be obtained from Mapillary.com. The key has to be saved in the config.py file.
Since Mapillary is only providing the coordinates of each detected traffic sign, signs are added to the lanelet with the closest distance. This strategy can sometimes lead to traffic signs that are not correctly placed in the final scenario. A manual review is therefore recommended.
It is also possible to change the behavior how traffic signs are added to the scenario using config.py file. For example, Mapillary can be used as single source for traffic signs or several filters can be applied on signs.
Configuration
There are several parameters which can be edited in config.py. These Parameters can also be set in the GUI via edit settings.
Benchmark Settings
- BENCHMARK_IDName of the benchmark. See CommonRoad documentation for naming conventionBENCHMARK_ID = “ZAM_Test-1_1_T-1”
- AUTHORAuthor of the benchmarkAUTHOR = “Automated converter by Maximilian Rieger”
- AFFILIATIONAffiliation of the benchmarkAFFILIATION = “Technical University of Munich, Germany”
- SOURCESource of the benchmarkSOURCE = “OpenStreetMaps (OSM)”
- TAGSAdditional tags for the benchmarkTAGS = “urban”
- GEONAMES_USERNAMEGeonames username to retrieve geonamesID for created scenariosGEONAMES_USERNAME = “demo”
- MAPILLARY_CLIENT_IDMapillary Client ID which can be set to extract additional traffic signs. If set to “demo”, Mapillary signs will be disabledMAPILLARY_CLIENT_ID = “demo”
- TIMESTEPSIZETime step size for the benchmark in secondsTIMESTEPSIZE = 0.1
Aerial Image Settings
- AERIAL_IMAGESUse aerial images for editAERIAL_IMAGES = False
- IMAGE_SAVE_PATHPath to save downloaded aerial imagesIMAGE_SAVE_PATH = “files/imagery/”
- ZOOM_LEVELThe zoom level of Bing Maps tilesZOOM_LEVEL = 19
- BING_MAPS_KEYThe key to access bing mapsBING_MAPS_KEY = “key”
Map Download Settings
- SAVE_PATHPath to save downloaded filesSAVE_PATH = “files/”
- DOWNLOAD_EDGE_LENGTHHalf width of area downloaded in metersDOWNLOAD_EDGE_LENGTH = 200
- DOWNLOAD_COORDINATESCoordinates in latitude and longitude specifying the center of the downloaded areaDOWNLOAD_COORDINATES = (48.262447, 11.657881)
Scenario Settings
- LOAD_TUNNELSInclude tunnels in resultLOAD_TUNNELS = False
- MAKE_CONTIGUOUSDelete unconnected edgesMAKE_CONTIGUOUS = False
- SPLIT_AT_CORNERSplit edges at corners (~90° between two waypoint segments). This can help to model the course of roads on parking lots betterSPLIT_AT_CORNER = True
- USE_RESTRICTIONSUse OSM restrictions for linking processUSE_RESTRICTIONS = True
- ACCEPTED_HIGHWAYS_MAINLAYERTypes of roads extracted from the OSM file. Suitable types are: ‘motorway’, ‘trunk’, ‘primary’, ‘secondary’, ‘tertiary’, ‘unclassified’, ‘residential’, ‘motorway_link’, ‘trunk_link’, ‘primary_link’, ‘secondary_link’, ‘tertiary_link’, ‘living_street’, ‘service’ACCEPTED_HIGHWAYS_MAINLAYER = [‘motorway’, ‘trunk’, ‘primary’, ‘secondary’, ‘tertiary’, ‘unclassified’, ‘residential’, ‘motorway_link’, ‘trunk_link’, ‘primary_link’, ‘secondary_link’, ‘tertiary_link’, ‘living_street’, ‘service’]
- EXTRACT_SUBLAYERUse sublayers for different kind of ways, e.g. sidewalks or cycle pathsEXTRACT_SUBLAYER = False
- ACCEPTED_HIGHWAYS_SUBLAYERTypes of highways extracted from the OSM file as sublayer. Elements must not be in ACCEPTED_HIGHWAYS_MAINLAYERACCEPTED_HIGHWAYS_SUBLAYER = [“path”, “footway”, “cycleway”]
- SUBLAYER_LANELETTYPELanelet type of the sublayer laneletsSUBLAYER_LANELETTYPE = ‘sidewalk’
- CROSSING_LANELETTYPELanelet type of the sublayer lanelets that cross the main layer. Overwrites SUBLAYER_LANELETTYPE for lanelets applied onCROSSING_LANELETTYPE = ‘crosswalk’
- REJECTED_TAGSOSM ways with these tags are not taken into accountREJECTED_TAGS = {“area”: “yes”}
- LANECOUNTSnumber of lanes for each type of road should be >=1LANECOUNTS = {‘motorway’: 6, ‘trunk’: 4, ‘primary’: 2, ‘secondary’: 2, ‘tertiary’: 2, ‘unclassified’: 2, ‘residential’: 2, ‘motorway_link’: 2, ‘trunk_link’: 2, ‘primary_link’: 2, ‘secondary_link’: 2, ‘tertiary_link’: 2, ‘living_street’: 2, ‘service’: 2}
- LANEWIDTHSWidth of lanes for each type of road in metersLANEWIDTHS = {“motorway”: 3.5, “trunk”: 3.5, “primary”: 3.5, “secondary”: 3.5, “tertiary”: 3.5, “unclassified”: 3.5, “residential”: 3.5, “motorway_link”: 3.5, “trunk_link”: 3.5, “primary_link”: 3.5, “secondary_link”: 3.5, “tertiary_link”: 3.5, “living_street”: 3.5, “service”: 3.5, “path”: 2.0, “footway”: 2.0, “cycleway”: 2.0}
- SPEED_LIMITSDefault speed limit for each type of road in km/hSPEED_LIMITS = {‘motorway’: 120, ‘trunk’: 100, ‘primary’: 100, ‘secondary’: 100, ‘tertiary’: 100, ‘unclassified’: 80, ‘residential’: 50, ‘motorway_link’: 80, ‘trunk_link’: 80, ‘primary_link’: 80, ‘secondary_link’: 80, ‘tertiary_link’: 80, ‘living_street’: 7, ‘service’: 10}
Export Settings
- INTERPOLATION_DISTANCEDesired distance between interpolated waypoints in metersINTERPOLATION_DISTANCE = 0.5
- COMPRESSION_THRESHOLDAllowed inaccuracy of exported lines to reduce number of way points in metersCOMPRESSION_THRESHOLD = 0.05
- EXPORT_IN_UTMExport the scenario in UTM coordinatesEXPORT_IN_UTM = False
- FILTERToggle filtering of negligible waypointsFILTER = True
- DELETE_INVALID_LANESDelete invalid lanes before exportDELETE_INVALID_LANES = True
Internal Settings
These settings can be used to improve the conversion process for individual scenarios
- EARTH_RADIUSRadius of the earth used for calculation in metersEARTH_RADIUS = 6371000
- DELETE_SHORT_EDGESDelete short edges after croppingDELETE_SHORT_EDGES = False
- INTERPOLATION_DISTANCE_INTERNALDistance between waypoints used internally in metersINTERPOLATION_DISTANCE_INTERNAL = 0.5
- BEZIER_PARAMETERBezier parameter for interpolation (should be within [0, 0.5])BEZIER_PARAMETER = 0.35
- INTERSECTION_DISTANCEDistance between roads at intersection used for cropping in metersINTERSECTION_DISTANCE = 4.0
- INTERSECTION_DISTANCE_SUBLAYERAssociated with pedestrian pathways by defaultINTERSECTION_DISTANCE_SUBLAYER = 1.0
- INTERSECTION_CROPPING_WITH_RESPECT_TO_ROADSDefines if the distance to other roads is used for cropping. If false the distance to the center of the intersection is usedINTERSECTION_CROPPING_WITH_RESPECT_TO_ROADS = True
- SOFT_ANGLE_THRESHOLDThreshold above which angles are considered as soft in degreesSOFT_ANGLE_THRESHOLD = 55.0
- LANE_SEGMENT_ANGLELeast angle for lane segment to be added to the graph in degrees. If you edit the graph by hand, a value of 0 is recommendedLANE_SEGMENT_ANGLE = 5.0
- CLUSTER_LENGTHLeast distance between graph nodes to try clustering in metersCLUSTER_LENGTH = 10.0
- LEAST_CLUSTER_LENGTHLeast length of cluster to be added in metersLEAST_CLUSTER_LENGTH = 10.0
- MERGE_DISTANCEMaximal distance between two intersections to which they are merged, if zero, no intersections are mergedMERGE_DISTANCE = 3.5
- INTERSECTION_STRAIGHT_THRESHOLDThreshold which is used to determine if a successor of an incoming lane is considered as straightINTERSECTION_STRAIGHT_THRESHOLD = 35.0
- INTERSECTION_ENHANCEMENTOption to clean up intersections and add new traffic lights to itINTERSECTION_ENHANCEMENT = True
- REMOVE_UNCONNECTED_LANELETSOption to remove unconnected lanelets from the main lanelet scenarioREMOVE_UNCONNECTED_LANELETS = True
- RECOGNIZED_TURNLANESSet of processed turn lanes. This should only be changed for further developmentRECOGNIZED_TURNLANES = [“left”, “through”, “right”, “merge_to_left”, “merge_to_right”, “through;right”, “left;through”, “left;through;right”, “left;right”, “none”]
Traffic Lights
- TRAFFIC_LIGHT_CYCLECycle that will be applied to each traffic light. Values in secondsTRAFFIC_LIGHT_CYCLE = {“red_phase”: 57, “red_yellow_phase”: 3, “green_phase”: 37, “yellow_phase”: 3}
Traffic Signs
- TRAFFIC_SIGN_VALUESValues to search for in OSMTRAFFIC_SIGN_VALUES = [“traffic_signals”, “stop”, “give_way”, “city_limit”]
- TRAFFIC_SIGN_KEYSKeys to search for in OSMTRAFFIC_SIGN_KEYS = [“traffic_sign”, “overtaking”, “traffic_signals:direction”, “maxspeed”]
- MAPILLARY_CATEGORIESCategories to include if mapillary is used for sign extractionMAPILLARY_CATEGORIES = [“warning”, “regulatory”, “information”, “complementary”]
- ACCEPTED_TRAFFIC_SIGNSInclude traffic signs based on their id, e.g. “Max_SPEED”. Keep “ALL” to accept all found traffic singsACCEPTED_TRAFFIC_SIGNS = [“ALL”]
- EXCLUDED_TRAFFIC_SIGNSExclude traffic signs based on their id, e.g. “MAX_SPEED”. “ALL” has to be set in ACCEPTED_TRAFFIC_SIGNSEXCLUDED_TRAFFIC_SIGNS = []
User Edit Activation
- USER_EDITToggle edit for userUSER_EDIT = False